1. Log in to the Supplier Portal and click on Services in the left-hand menu. Select the service category your service is under.
2. Find the service you want to activate or reactivate (you can do this quickly by using the Search function at the top of the page) and click on the pencil icon to edit the service.
3. It’s a good idea to check the information on each tab is still correct – you may need to adjust the service description for example, or even the year levels linked to the service.
Linked Year Levels
In this section, you will choose who your event will be available to. Only parents with a student in the selected year level/s can place orders through Flexischools for your event.
1. Next to ‘Schools’, select which school/s you would like your event to be available to.
2. Select which year level/s you would like your event to be available to and click 'Save and Continue'.
.png?width=583&height=356&name=Supplier%20Portal%20Screenshots%20(3).png)
Tip! If you would like to preview your event before it becomes available to parents, link only the admin level for now. Scroll to the bottom of this page for instructions to preview your event.
4. The next step is to navigate to the ‘Service Dates’ tab
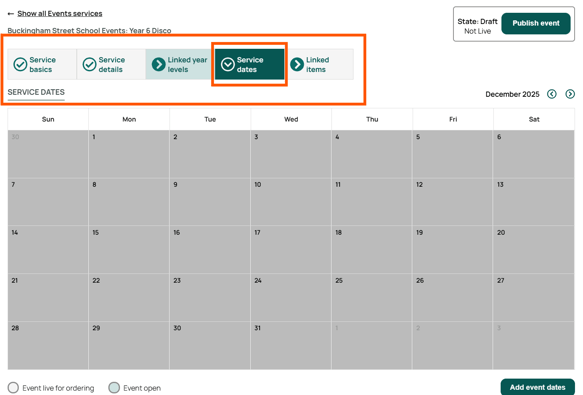
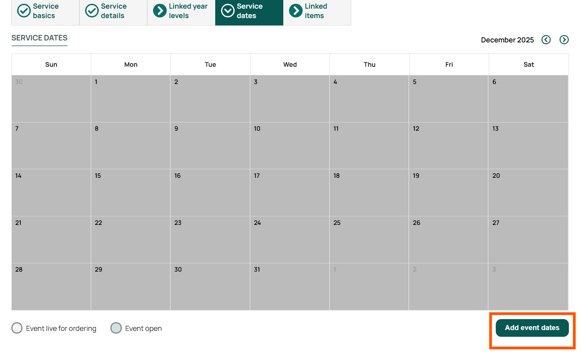
5. Click on the Add Service Dates button at the bottom right of the calendar or click on the date of your service on the calendar.
6. You will be presented with a pop-up where you need to add the date or dates of the service – select the ‘from’ and ‘to dates’ – these are the date/s you are providing the service to customers.
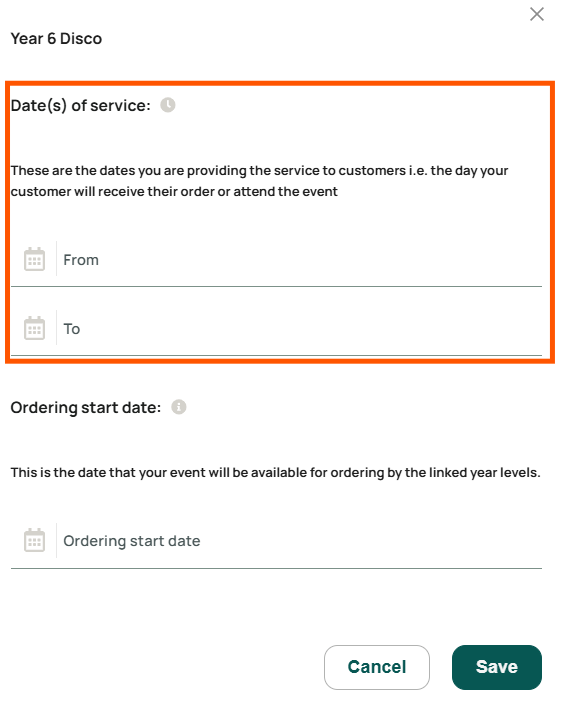
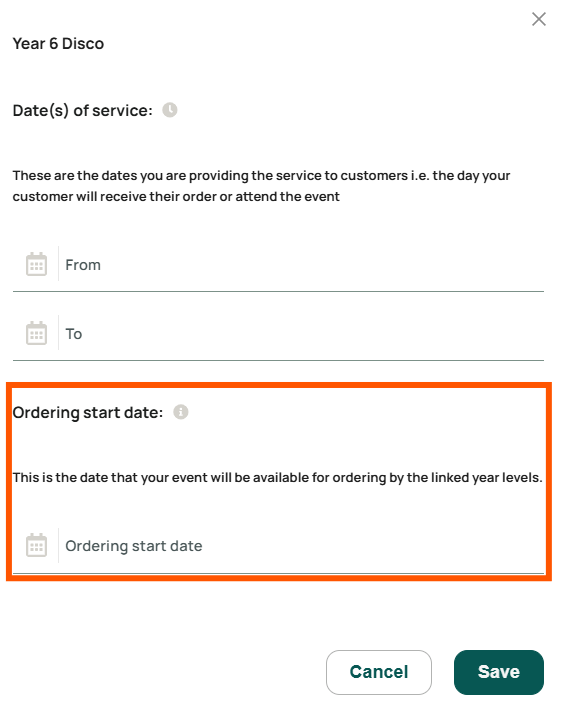
7. You then need to select a date you would like your service to go live – this is the date your service becomes visible online for ordering (to the linked year levels).
8. Remember to hit save to add the new service dates. You will then see the new service date/s in green on the calendar. The white dates leading up to the service date are the days when the service is live for ordering.

9. Before finishing up, make sure your cutoff time is correct (you can see this under the calendar) and make sure the Items linked to the service are all correct too. You can easily add more items to the service if you wish by following the link on the ‘Linked Items’ tab.

10. The final step is to ensure you service is Active – you can check this in the top right hand corner where the state should say ‘Active’. If it doesn’t, simply click the ‘Activate’ button.