You can now create and manage Payments Services directly from your Flexischools Supplier Portal.
Payments Services are perfect for collecting P&C contributions, donations, and simple one‑off payments where no items, tickets or products are needed.
Need help logging in and navigating to the supplier portal? Click here.
Need inspiration? Click here to read about running a donation service on Flexischools.
🎥 Creating a Payments Service – Video Guide
Watch this short video to learn how to create and set up a Payments Service in your Supplier Portal.
How to Add a New Payments Service
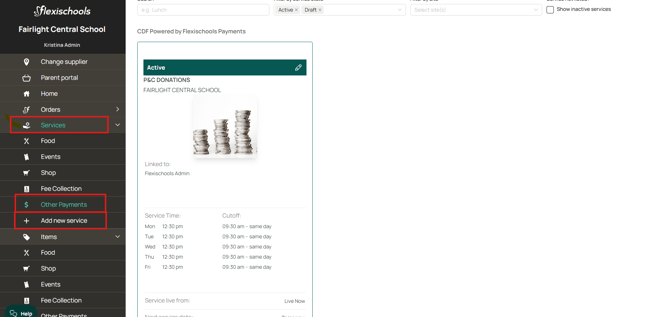
- Log in to your Supplier Portal and click ‘Services’.
- From the drop‑down menu, select ‘Add New Service’. If your payments module has already been created, you may see a "Other Payments" option.
- Choose ‘Add New payments Service’.
If you don’t have permission to add new services, please speak to your Finance Manager or Flexischools admin to request access. You can also request access to add new services at any time through the Forms and Requests section of the Supplier Portal.
Payments Basics
-
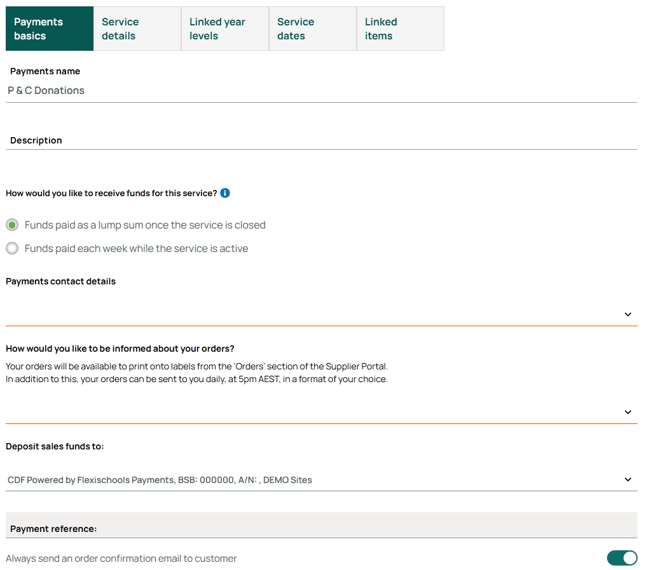
Enter your service details, including name of service such as "P&C Donations".
Service Description This is what parents will see, so include key information such as what the payment is for, any deadlines and any further instructions for parents/guardians.
How would you like to receive funds for this service? As part of setting up your service, you'll need to choose how Flexischools transfers your collected funds. Select the payout method that best suits how you plan to manage and reconcile your payments.
a. Funds paid as a lump sum once the service is closed Choose this option if you want all payments collected and transferred to you in one payment after the service has finished. This is ideal for one‑off services where you only need to reconcile funds once everything is complete. This assist with reducing admin for services that run for a short period, allowing for only one payment to track.
- Selecting this option will set the service up as a once‑off service.b. Funds paid each week while the service is active Choose this option if you prefer payments to be deposited into your account on a weekly basis throughout the duration of the service. This is best for ongoing services where regular payouts support operational needs and costs. This option helps support consistent cashflow and makes reconciling long‑running services easier.
- Selecting this option sets the service up as an ongoing service.
How would you like to be informed about your orders? Your orders will always be available to view and print from the ‘Orders’ section of the Supplier Portal.
In addition to this, you can choose to receive a daily email summary of your orders around 5pm AEST. You can select from the following formats:
a. I only need labels Choose this option if you prefer to view order details directly in the portal and only need printable packing labels emailed to you each day.
b. I'd like my orders emailed to me in a daily spreadsheet This option provides a simple daily spreadsheet that lists all orders made that day. You will still be able to print labels if you wish. It’s useful for quick overviews, stock checks, or tallying quantities.
c. I'd like my orders emailed to me daily in a page‑per‑order format (order confirmation + tax invoice) This format sends one page per order, including full order details, customer information and a tax invoice.
This option is recommended for Uniform Shops because it allows you to print each order individually along with a tax invoice. This makes it easy to attach the printed invoice to the correct bag or bundle and streamline packing and collection.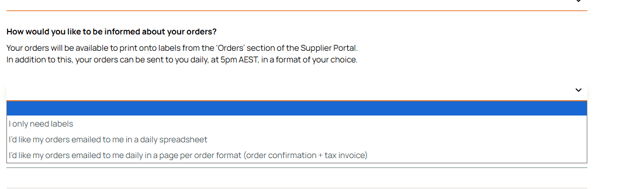
Tip! Choosing “I’d like my orders emailed to me in a daily spreadsheet” automatically locks in the day’s orders at the time the spreadsheet is sent. This prevents any cancellations after that point, helping you keep accurate records and avoid last‑minute changes, otherwise, orders are locked once printed.
Payment Contact This is who we contact if we need more information. It will not be visible to parents, but email and phone number may be provided upon request in the event they need to cancel an order or speak directly with the payments contact. Emergency contact number is never provided to parents.
If your preferred contact isn’t listed, choose ‘The site contact I need is not listed’ and add their details.
The ‘Site Name’ should be the name of your school and payment service, for example: Fairlight Central School P&C Donations, and 'Site Address' should be the location of your school.
Deposit sale funds If your bank details are not listed, you will be prompted to complete this form. Our customer service team will then be in touch once the account has been added.
- Add an image for your payments service. This will be shown to parents on the Flexischools App.
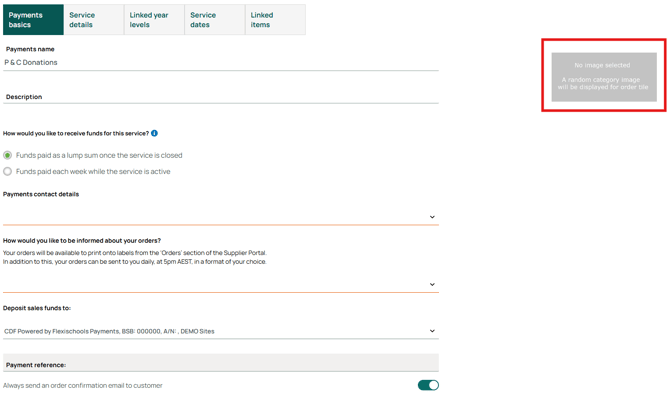
Scroll to the bottom of the page and click ‘Create’.
Don’t worry, you can come back at any time and change these details by clicking the pencil in the active bar of the service.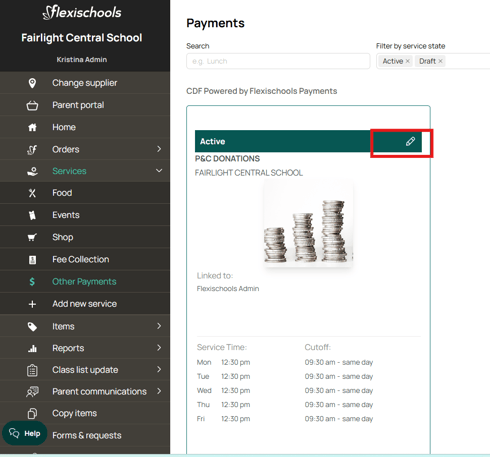
Linked Year Levels
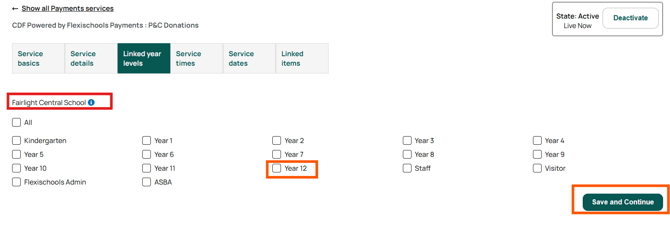
In this section, you will choose who your payments service will be available to. Only parents with a student in the selected year level/s can place orders through Flexischools for your service.
- Under your schools name you can select the year levels who should be able to purchase uniforms and click ‘Save and Continue’.
- If you have multiple schools/businesses showing on this page, you can select the school(s) where this service should appear.
Tip! If you would like to preview your payments service before it becomes available to parents, link only the admin level for now. Scroll to the bottom of this page for instructions to preview your payments service.
Service Dates
- Find and select the date you would like your payments to be due, on the calendar, or click the "add Payments dates" at the bottom of the Calander.
- In the pop-up, enter the below details and click ‘Save’.
Date of Service:
The date/s your payment is applies to.
If you only need to input one day, use the same date in both the From and To fields.Ordering Start Date:
The date parents can begin placing orders for your payments service in the Flexischools App.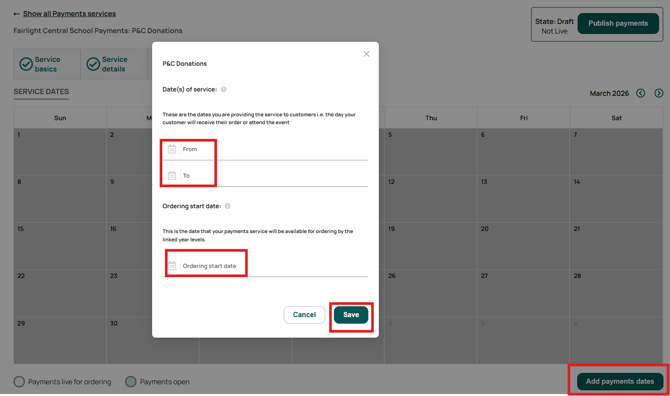
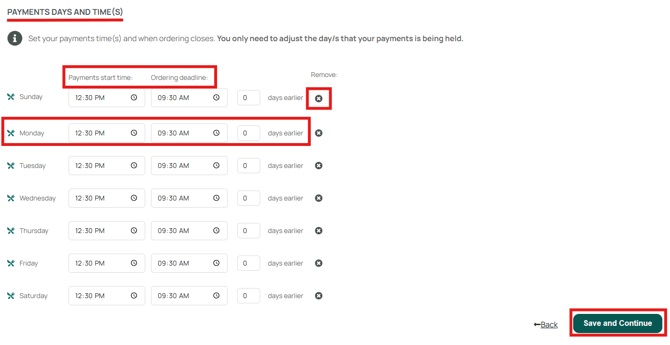
- Scroll down to edit the ‘Payment days and times + Cut-off times’. You only need to adjust the day if the week your payment is allocated for.
You can remove any unnecessary days by clicking the X next to them, if you prefer.
Payments start Time is a required field that normally applies to food or event services, indicating the time the service begins. For payment‑only services you can simply leave the default time (12:30 pm) as is—there’s no need to adjust it unless your school has a specific reason to display a different time.
Ordering Cutoff This is the time that the payments service will stop being available to parents on their Flexischools App. Enter the time and how many days prior to the payments date you would like parents to stop being able to place orders.
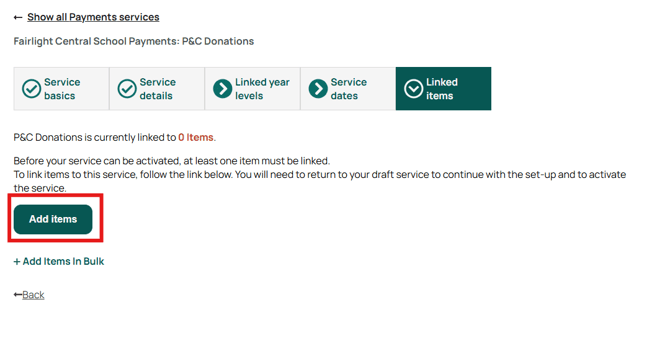
Linked Items
This is where you create and edit payment Categories, Items, and Options.
Items might include things like camp fees, excursion payments, event tickets, donations, or other school‑related charges.
To begin linking items, select the Add items button.
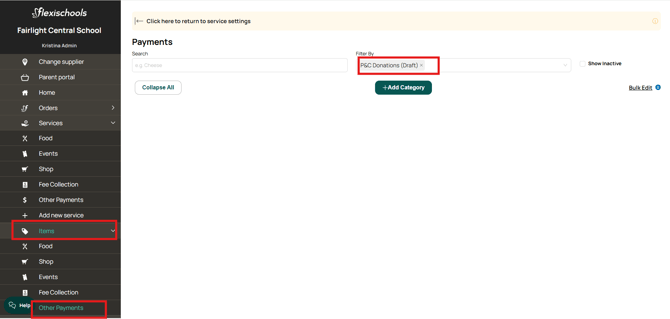
You will be taken to the Items section, with your current Payments service automatically pre‑selected in the Filter by field.
Linking an Existing Item
-
Locate the item in the "items" then "Other Payments" tabs and click on the item name. Alternatively, you can clear the pre‑selected filter on the Items page you were directed to and then select the item from your existing list.
-
Once in the item editing page, under ‘Services the Item Appears In’, select your payments service.
-
Click ‘Save’.
Creating a new category
If you would like to create an item in an existing category, skip to 'Creating a new item'
Categories help you group similar payment items (e.g., “Camps”, “Excursions”, “Fundraisers”, “Event Tickets”).
To create a new category:
-
-
Click ‘Add Category’.
-
Enter the name, description, and select an image (optional).
-
Click ‘Create

-
Creating a New Item
- Find the category you would like your item to appear in and click the plus icon to the right of the category name.
In the below example, an item will be added to the 'P&C Donations' category.
- Enter the name, description, and price of your item
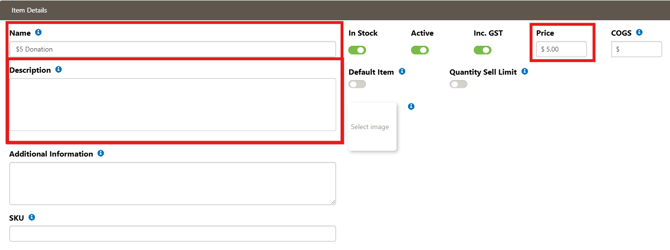
- You can upload an image for the item if you wish, by pressing on the "Select Image" box. The image displays alongside the item name in the uniform shop catalogue
Quantity Sell Limit can be enabled should you wish to restrict how many of this item can be purchased. Two options are available:
Per Service Time: means that for each service the item is linked to, the QSL limit applies separately for each service and resets every day that service occurs.
Total: This option places a fixed overall limit across all services.
Once the total limit is reached, the item will remain at 0 available until you manually reset it.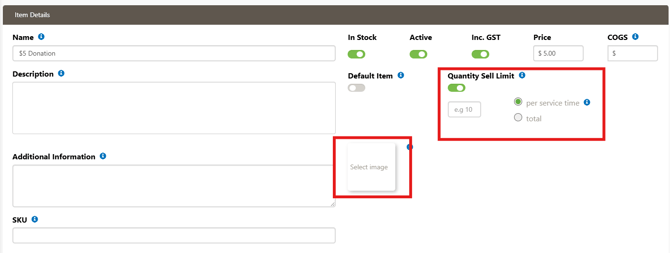
- Under ‘Services the Item Appears In’ select your service (e.g., P&C Donations). Items can be linked to multiple services.
Once selected, the item becomes linked and will appear for ordering in that service. Items can be linked to multiple services.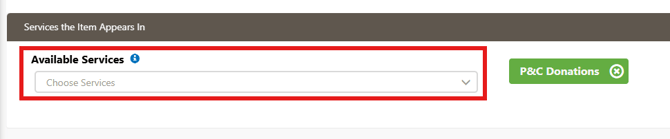
- Scroll down and click create, which will then allow you to add options to the item.

- Click here for more information about creating and managing options.
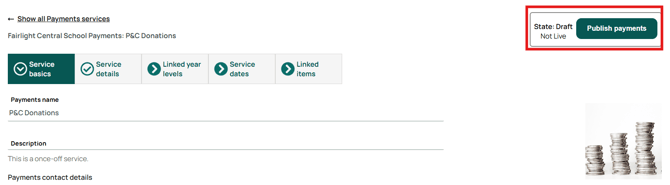
Activate your Payments Service
Return to your service settings, Click ‘Publish payments’ in the top right corner. This will make your payments service available for any parents with children in the linked year level.
Previewing Your Service
To preview your service before releasing it to parents, only link your service to Admin in the ‘Linked Year Levels’ section and comple the following steps.
- Log in to your Flexischools account.
- Ensure you have a test student profile linked to an ‘Admin’ year level.
- Ensure that your payments service is active.
- Your service should appear on the home page of your Flexischools account. Click on the shop Icon to begin placing an order.
When you are ready for your shop service to go live to parents, link the relevant classes to your service by updating the ‘Linked Year Levels’ section.
Need some extra help?
If you need any assistance creating a new payments service, please contact our friendly Customer Support Team by calling 1300 590 044, or, by completing our contact form, which can be found here.